Engine oil is the lifeblood of your car’s engine, keeping its moving parts lubricated and running smoothly. Over time, engine oil can become dirty or lose its effectiveness, leading to poor engine performance and even costly repairs. Regularly checking and changing your car’s engine oil is one of the most important maintenance tasks you can perform to ensure the longevity and efficiency of your vehicle. Fortunately, changing engine oil doesn’t require a trip to the mechanic. With the right tools and a little know-how, you can easily check and replace your car’s engine oil at home. In this step-by-step guide, we’ll walk you through the process, helping you keep your car in top shape while saving money on professional services.
Why Engine Oil is Important
Before diving into the process of checking and changing your engine oil, it’s essential to understand why it plays such a crucial role in vehicle maintenance. Engine oil reduces friction between the moving parts of the engine, which helps prevent overheating and wear. It also helps keep the engine clean by trapping dirt and debris that could cause damage. Regular oil changes ensure that your engine operates efficiently, preventing costly repairs down the road and improving fuel efficiency.
Step 1: Gather the Necessary Tools and Materials
To change your car’s engine oil, you’ll need a few basic tools and materials. These include:
- Wrench or socket set: To remove the drain plug and oil filter.
- Oil filter wrench: To remove the old oil filter.
- Drain pan: To catch the used oil.
- Funnel: To pour the new oil into the engine without spilling.
- New engine oil: Make sure to choose the right type and amount of oil for your vehicle.
- New oil filter: Ensure it’s compatible with your car’s make and model.
- Gloves and rags: To keep your hands clean and handle any spills.
- Car jack and jack stands (if necessary): To lift the car and access the oil pan.
Once you have all the necessary tools, you’re ready to begin the process.
Step 2: Prepare Your Car
Before getting started, make sure your car is parked on a flat surface. If needed, use a car jack to lift the vehicle, and secure it with jack stands to prevent it from shifting. Always ensure the car is turned off, and the engine has cooled down to avoid burns or injury. After the engine cools, engage the parking brake to prevent the vehicle from moving.
Next, open the hood and locate the oil fill cap. This is where you’ll add the new oil once you’re finished with the oil change. It’s helpful to remove the oil fill cap now, as it allows air to flow into the engine while draining the old oil, which speeds up the process.
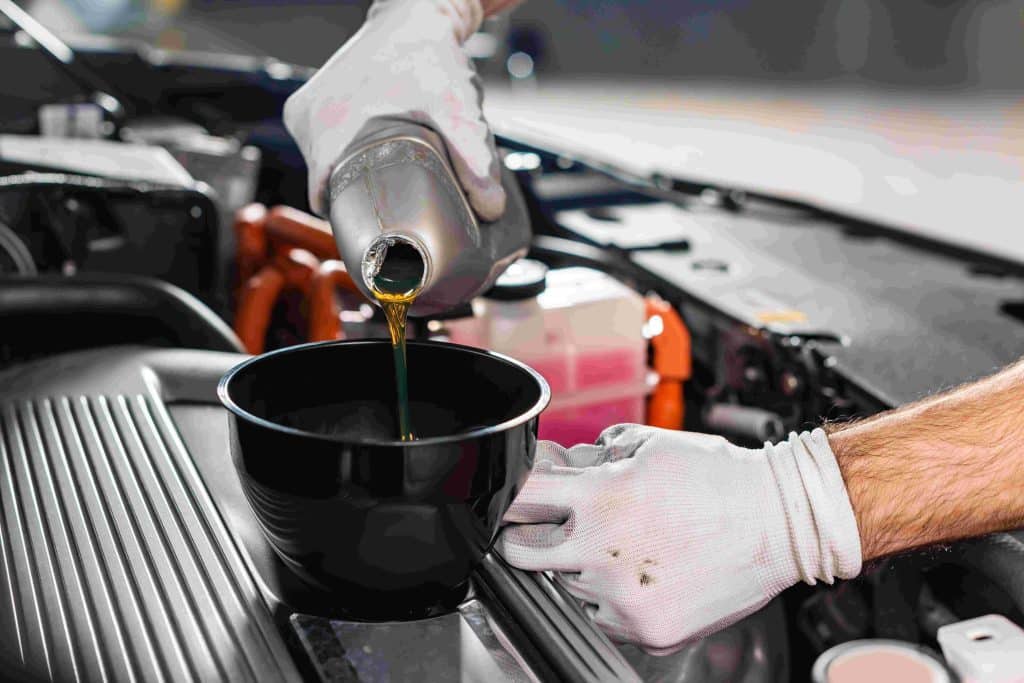
Step 3: Drain the Old Oil
Now, it’s time to drain the old engine oil. Position the drain pan underneath the oil pan’s drain plug. Using a wrench or socket set, carefully remove the drain plug, allowing the oil to flow into the pan. Be sure to wear gloves and keep your rags handy, as the oil may be hot.
Let the oil drain completely, which may take a few minutes. Once the oil has finished draining, replace the drain plug and tighten it securely. Be cautious not to overtighten the plug, as this could strip the threads or cause damage.
Step 4: Remove and Replace the Oil Filter
The oil filter is responsible for trapping dirt, debris, and other contaminants that accumulate in the engine oil. Over time, the filter becomes clogged and loses its effectiveness. Replacing the oil filter is an essential part of every oil change.
Using an oil filter wrench, carefully remove the old filter. Be prepared for some residual oil to spill when you remove the filter. Once removed, place the old filter in the drain pan for disposal.
Before installing the new oil filter, apply a small amount of new oil to the rubber gasket on the top of the filter. This helps create a better seal and makes it easier to remove the filter during the next oil change. Install the new oil filter by hand, turning it clockwise until it’s snug. Be sure not to overtighten, as this could cause damage to the filter or gasket.
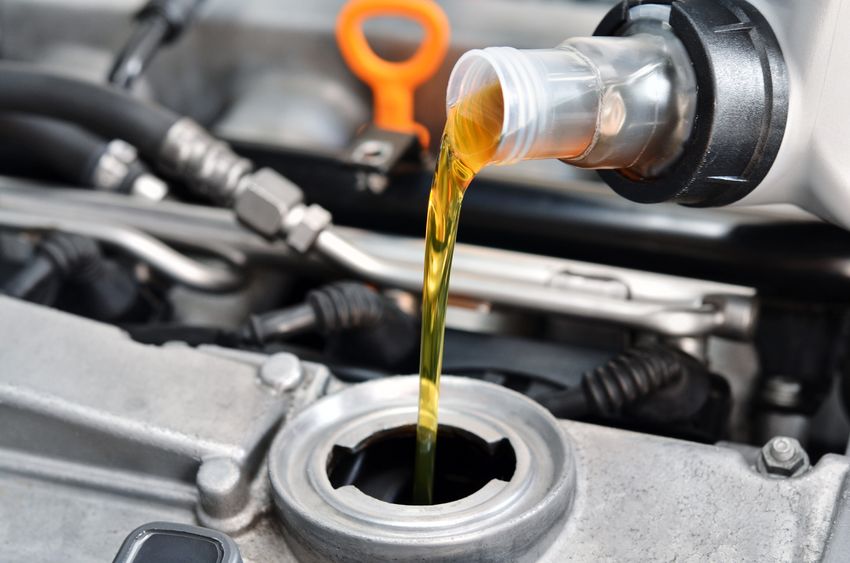
Step 5: Add New Engine Oil
With the drain plug secured and the oil filter replaced, it’s time to add fresh engine oil. First, check your car’s owner’s manual to determine the correct oil type and quantity for your vehicle. Different engines require different oil grades and viscosities, so be sure to choose the right one for optimal performance.
Using a funnel, pour the new oil into the engine through the oil fill cap. Add the specified amount of oil, checking the dipstick periodically to ensure you don’t overfill. Once you’ve added the correct amount, replace the oil fill cap.
Step 6: Check for Leaks and Oil Level
Start your car and let it idle for a few minutes. This allows the new oil to circulate throughout the engine and ensures the filter is properly filled. While the engine is running, carefully inspect the area around the drain plug and oil filter for any signs of leaks. If you notice any leaks, tighten the drain plug or oil filter as needed.
After the engine has run for a few minutes, turn it off and wait for a minute or two to allow the oil to settle. Then, use the dipstick to check the oil level. If the level is low, add more oil until it reaches the full mark on the dipstick.
Step 7: Dispose of Used Oil and Filter Properly
Used engine oil and oil filters should never be disposed of in regular trash. These materials can harm the environment and may be illegal to throw away. Most auto parts stores and service centers offer free oil recycling services, so take your used oil and filter to one of these locations. This helps ensure that the oil is properly disposed of or recycled.
Step 8: Reset the Oil Change Light (If Necessary)

Many modern vehicles are equipped with an oil change light that will illuminate when it’s time for an oil change. After changing your oil, it’s important to reset this light to help keep track of your next oil change. Consult your car’s owner’s manual for instructions on how to reset the oil change light, as the process can vary by make and model.
Final Thoughts
Changing your car’s engine oil is an essential maintenance task that helps ensure the smooth running and longevity of your vehicle. By following this step-by-step guide, you can easily check and replace the oil yourself, saving money on professional services and keeping your car in top condition. Remember to perform this maintenance regularly, according to your vehicle’s recommended schedule, and always use the correct oil for your engine. With a little time and effort, you can extend the life of your car and enjoy better performance on the road.
Key Takeaways:
- Engine oil is crucial for lubrication and overall engine health.
- Gather the right tools before beginning the oil change.
- Follow a systematic approach to drain old oil, replace the filter, and add fresh oil.
- Regularly check the oil level and ensure there are no leaks.
- Dispose of used oil and filters responsibly to protect the environment.
By maintaining your vehicle with regular oil changes, you’ll ensure its optimal performance for years to come.
Leave a Reply